Note: this installation for "Java Android Studio" . please follow step by step...
1. Android Studio
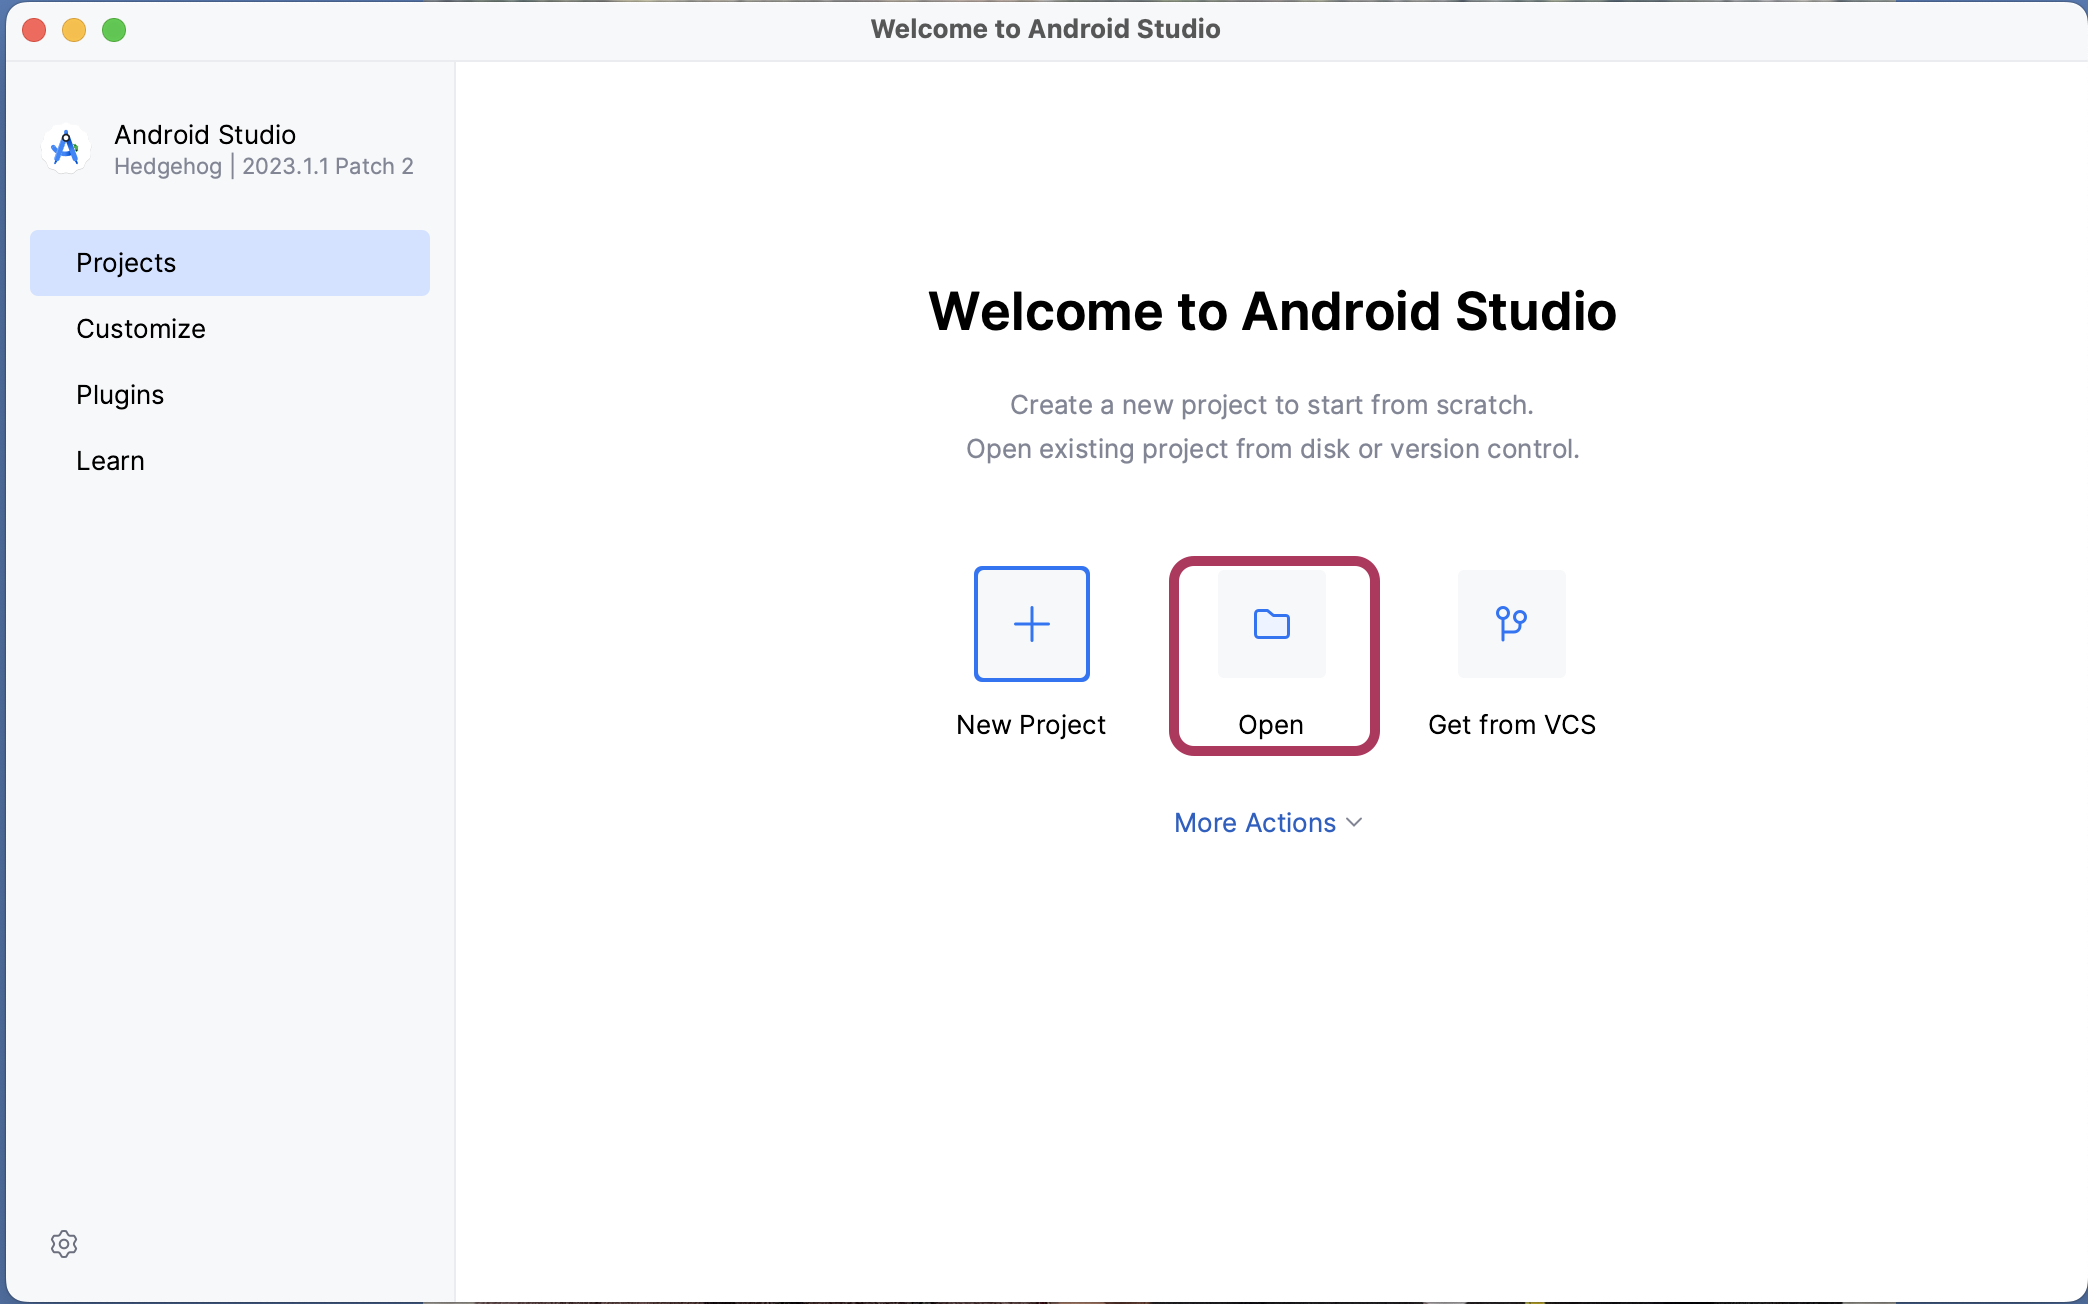
# Open Android Studio Application and Click on Open Icon
2. Unzip the downloaded file
# Unzip the Downloaded File and you will get this folder and open this folder.
3. Build.Gradle
# after open you’ll see this “build.gradle” folder, select build.gradle file and click on open and wait for building process it’s take some time to finish process. it’s totally depened on your internet speed and computer processor.
4. Change the package name
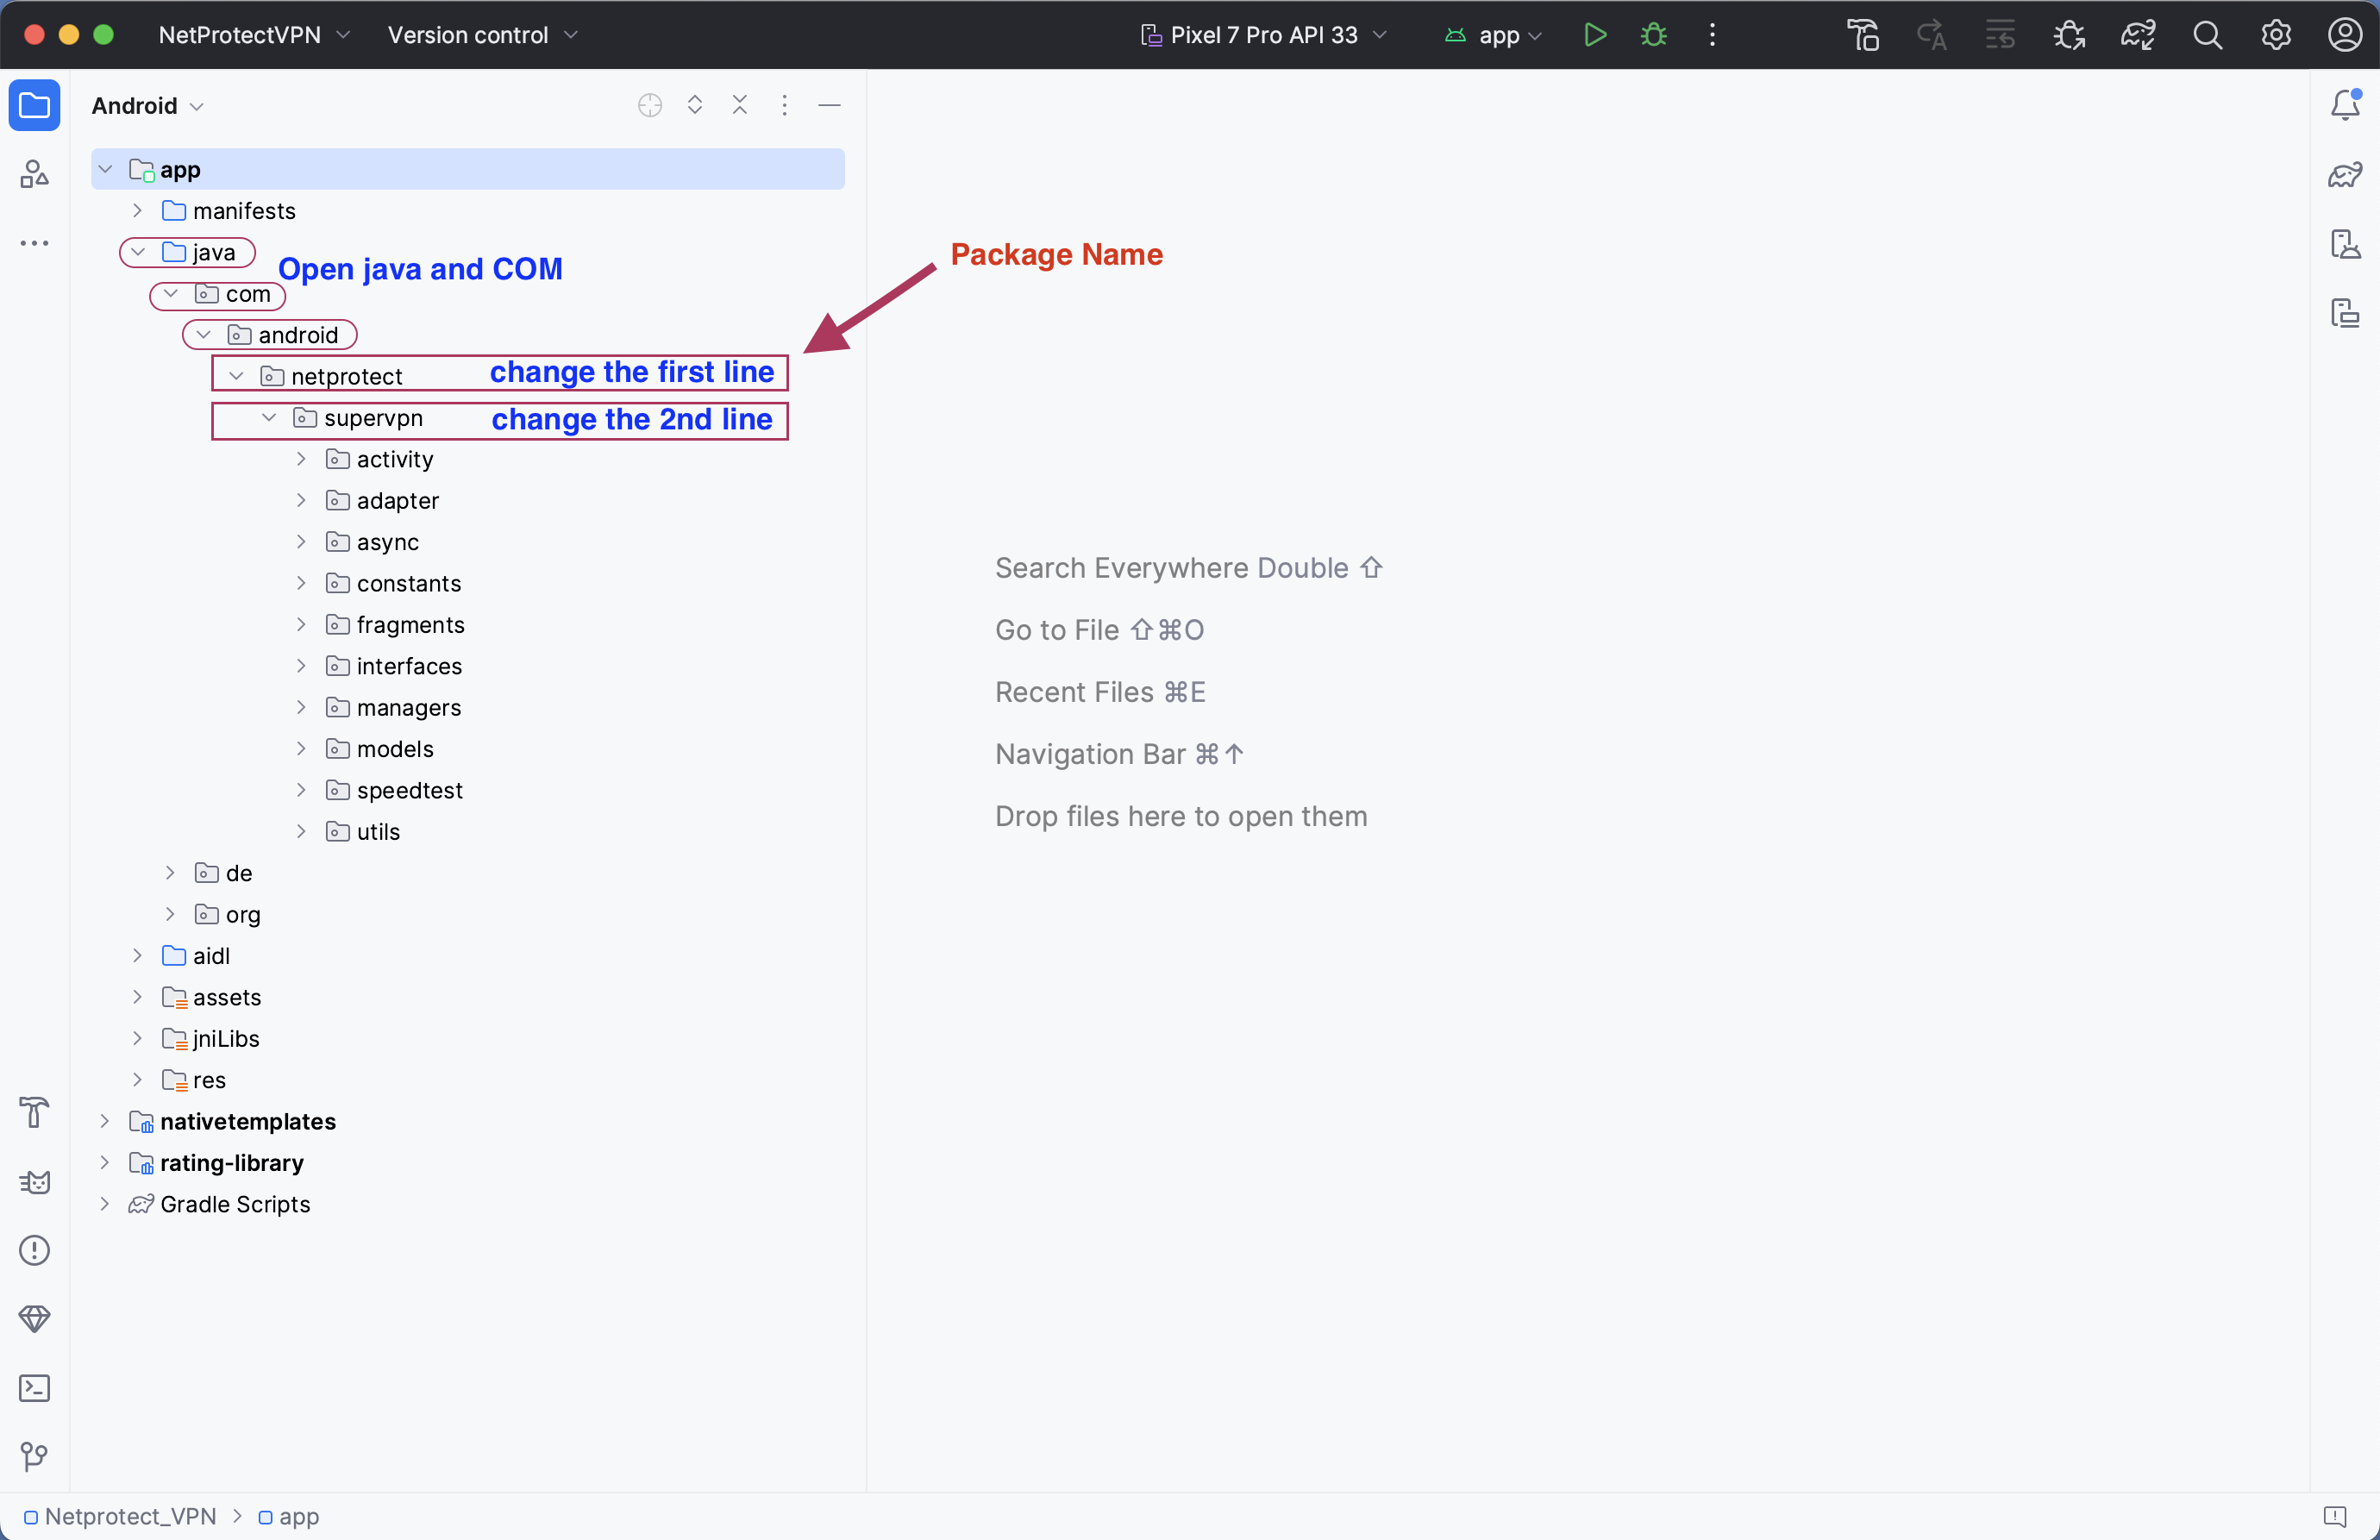
# after build finished, click on “java” arrow icon and open “com” . now you can see “first line” and “2nd line” , this line is your package name.
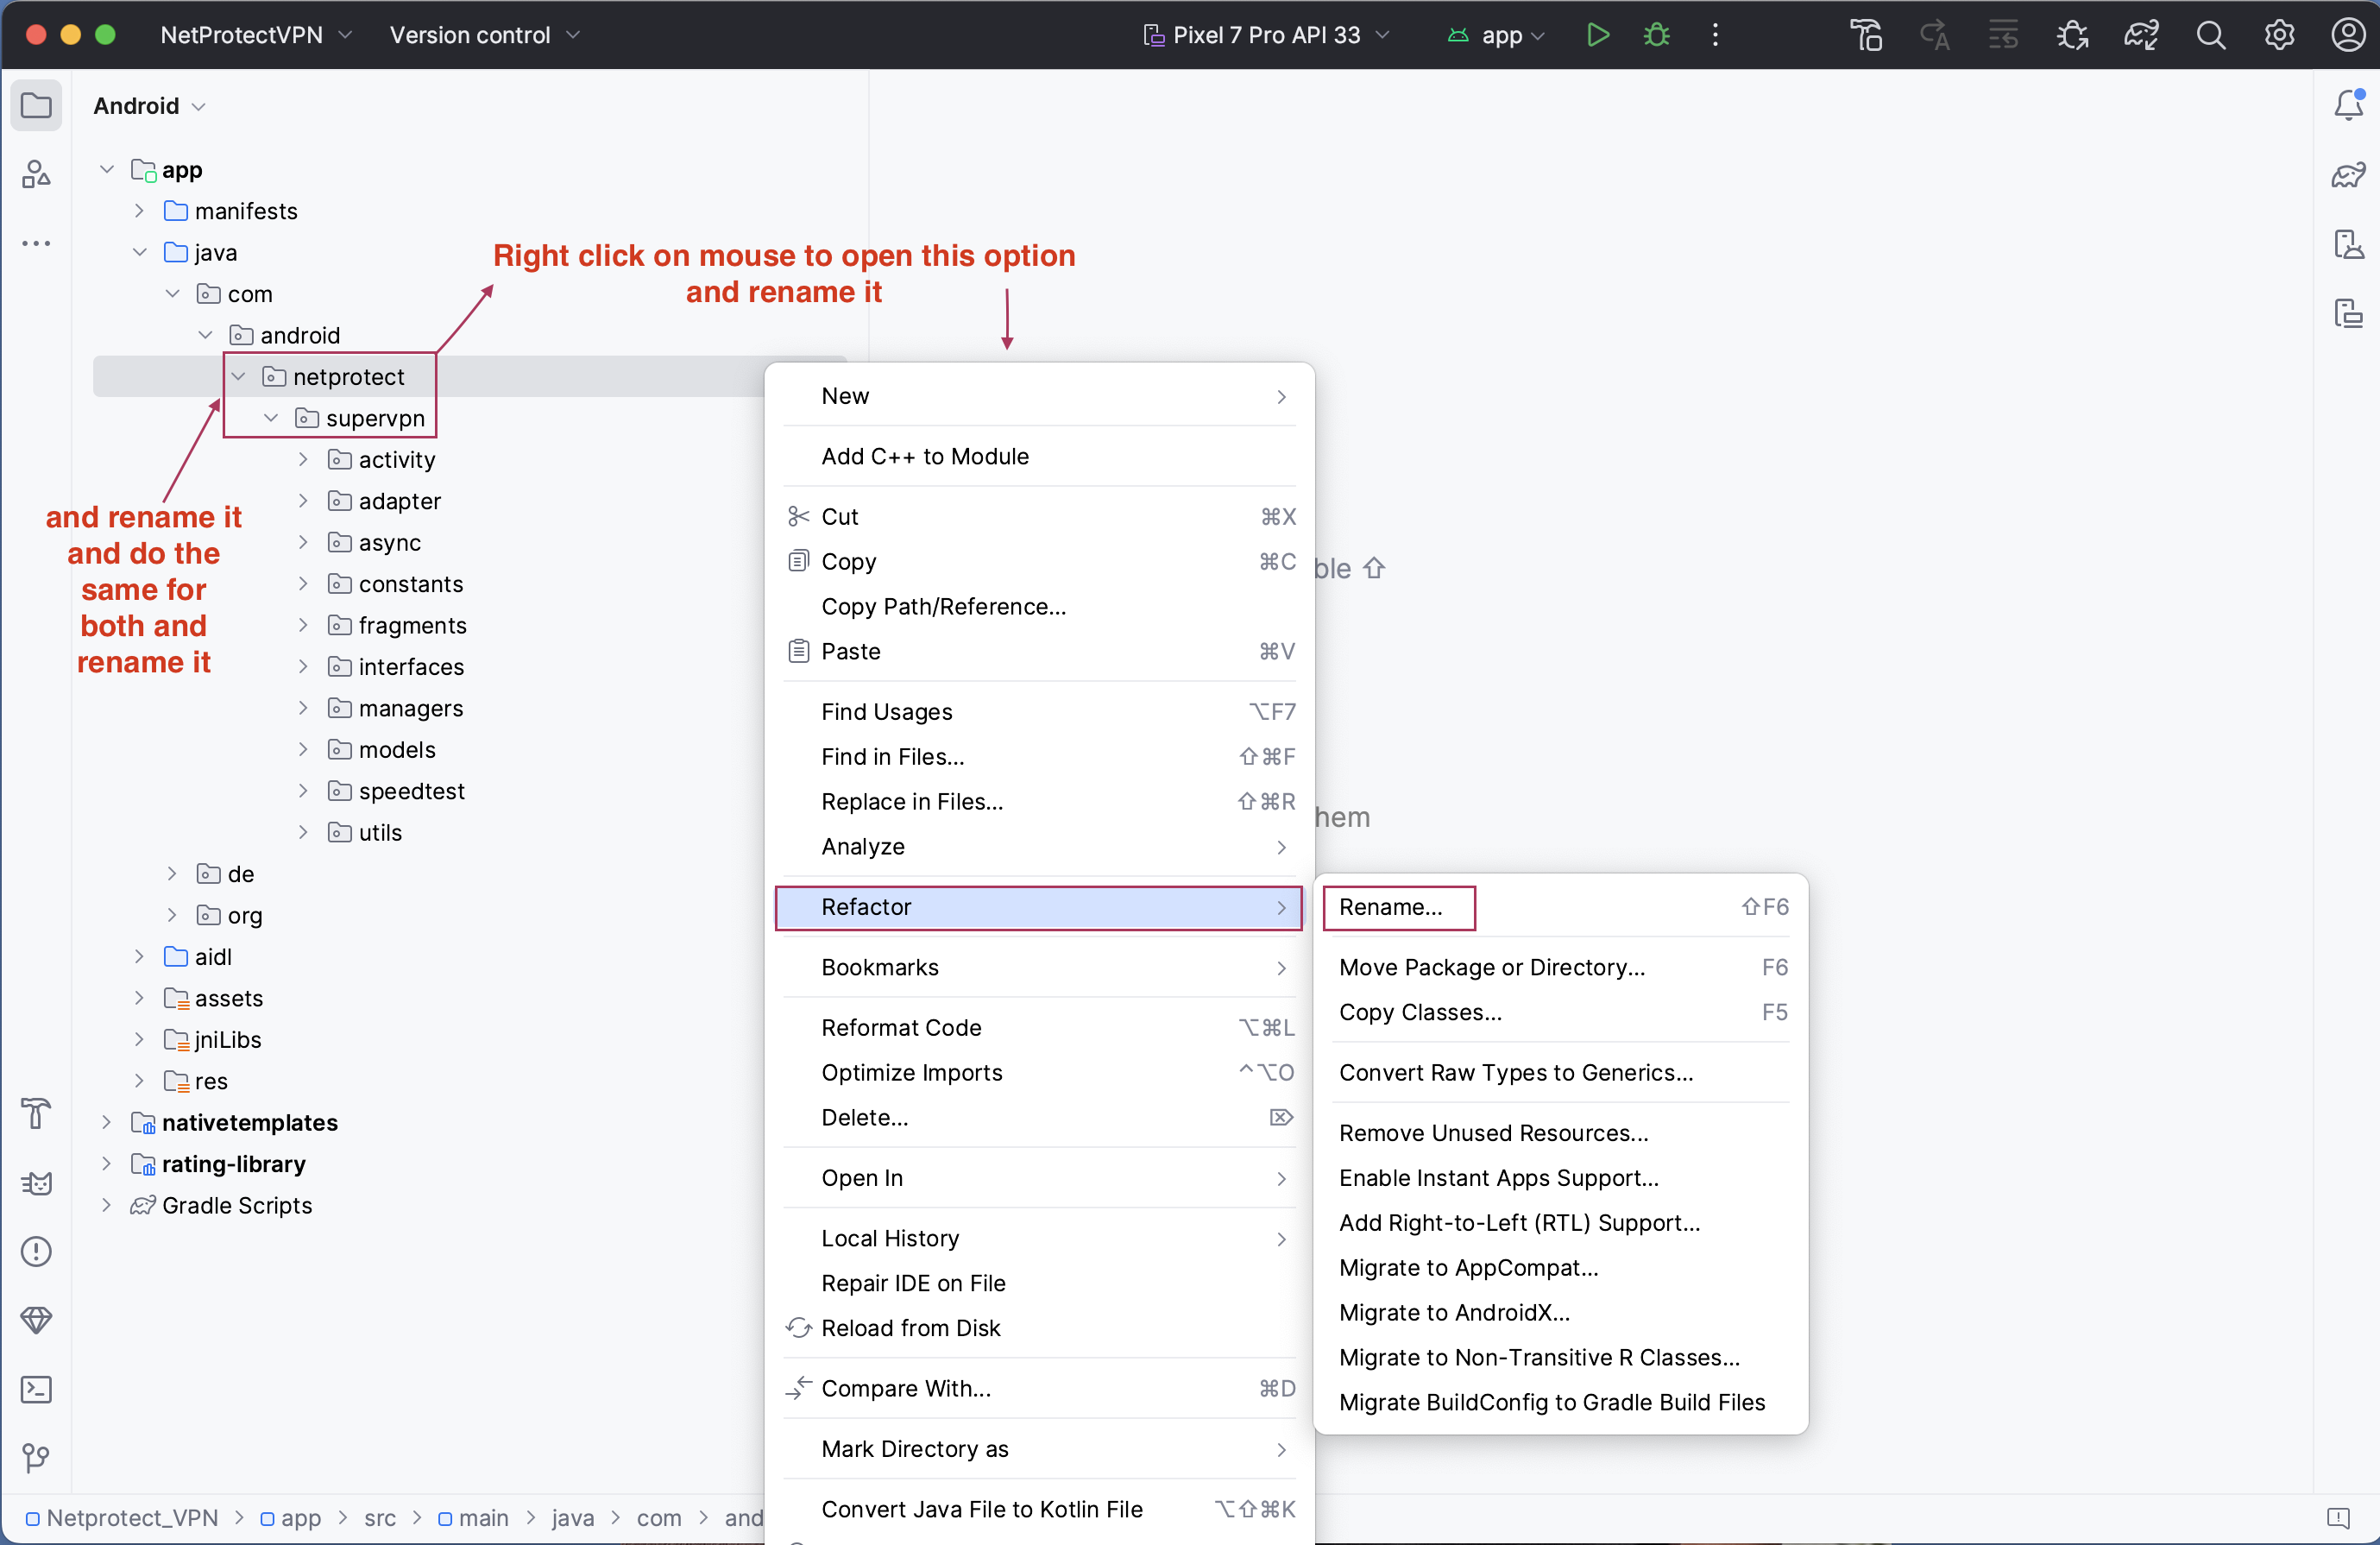
# Right click on package name and goto “Refactor” , “Rename” NOTE: you must change both name
# you can type your own text according to your app name
5. Logo
# To change logo- Goto “File” , “New” , and click on “Image Asset” to go the logo section
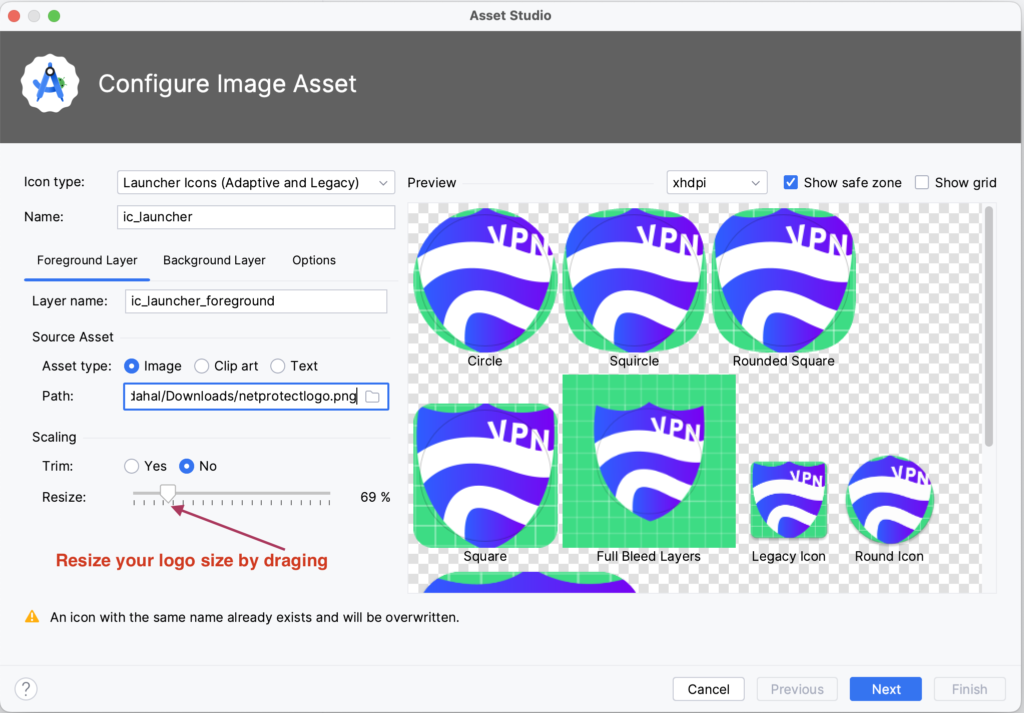
# Click on that “Folder icon” which is showing in image and “goto your File” and choose your own logo. (Recommened : Logo must be transparent)
# Resize your logo by draging this icon
# After Resized your logo look like this which is on image, now goto “Background Layer” , Select “Color” and choose your own background color, After this Click on “Next”
# This is the preview of your logo now click on “Finish” then your logo will setup
6. Setup your Admin Panel
# Now you’ll need to setup your Domain / SubDomain , put your own website url and it’s done. (NOTE: this setup is need for your admin panel. )
7. In App Purchase Setup
# After URL setup, scroll down and enter your product id. If you didn’t know product id then goto Play Console and Subscription then Create your 3 Product id and Enter it here.
8. OneSignal APP ID setup
# Enter your OneSignal APP id here. this is need for Push and InApp notification.
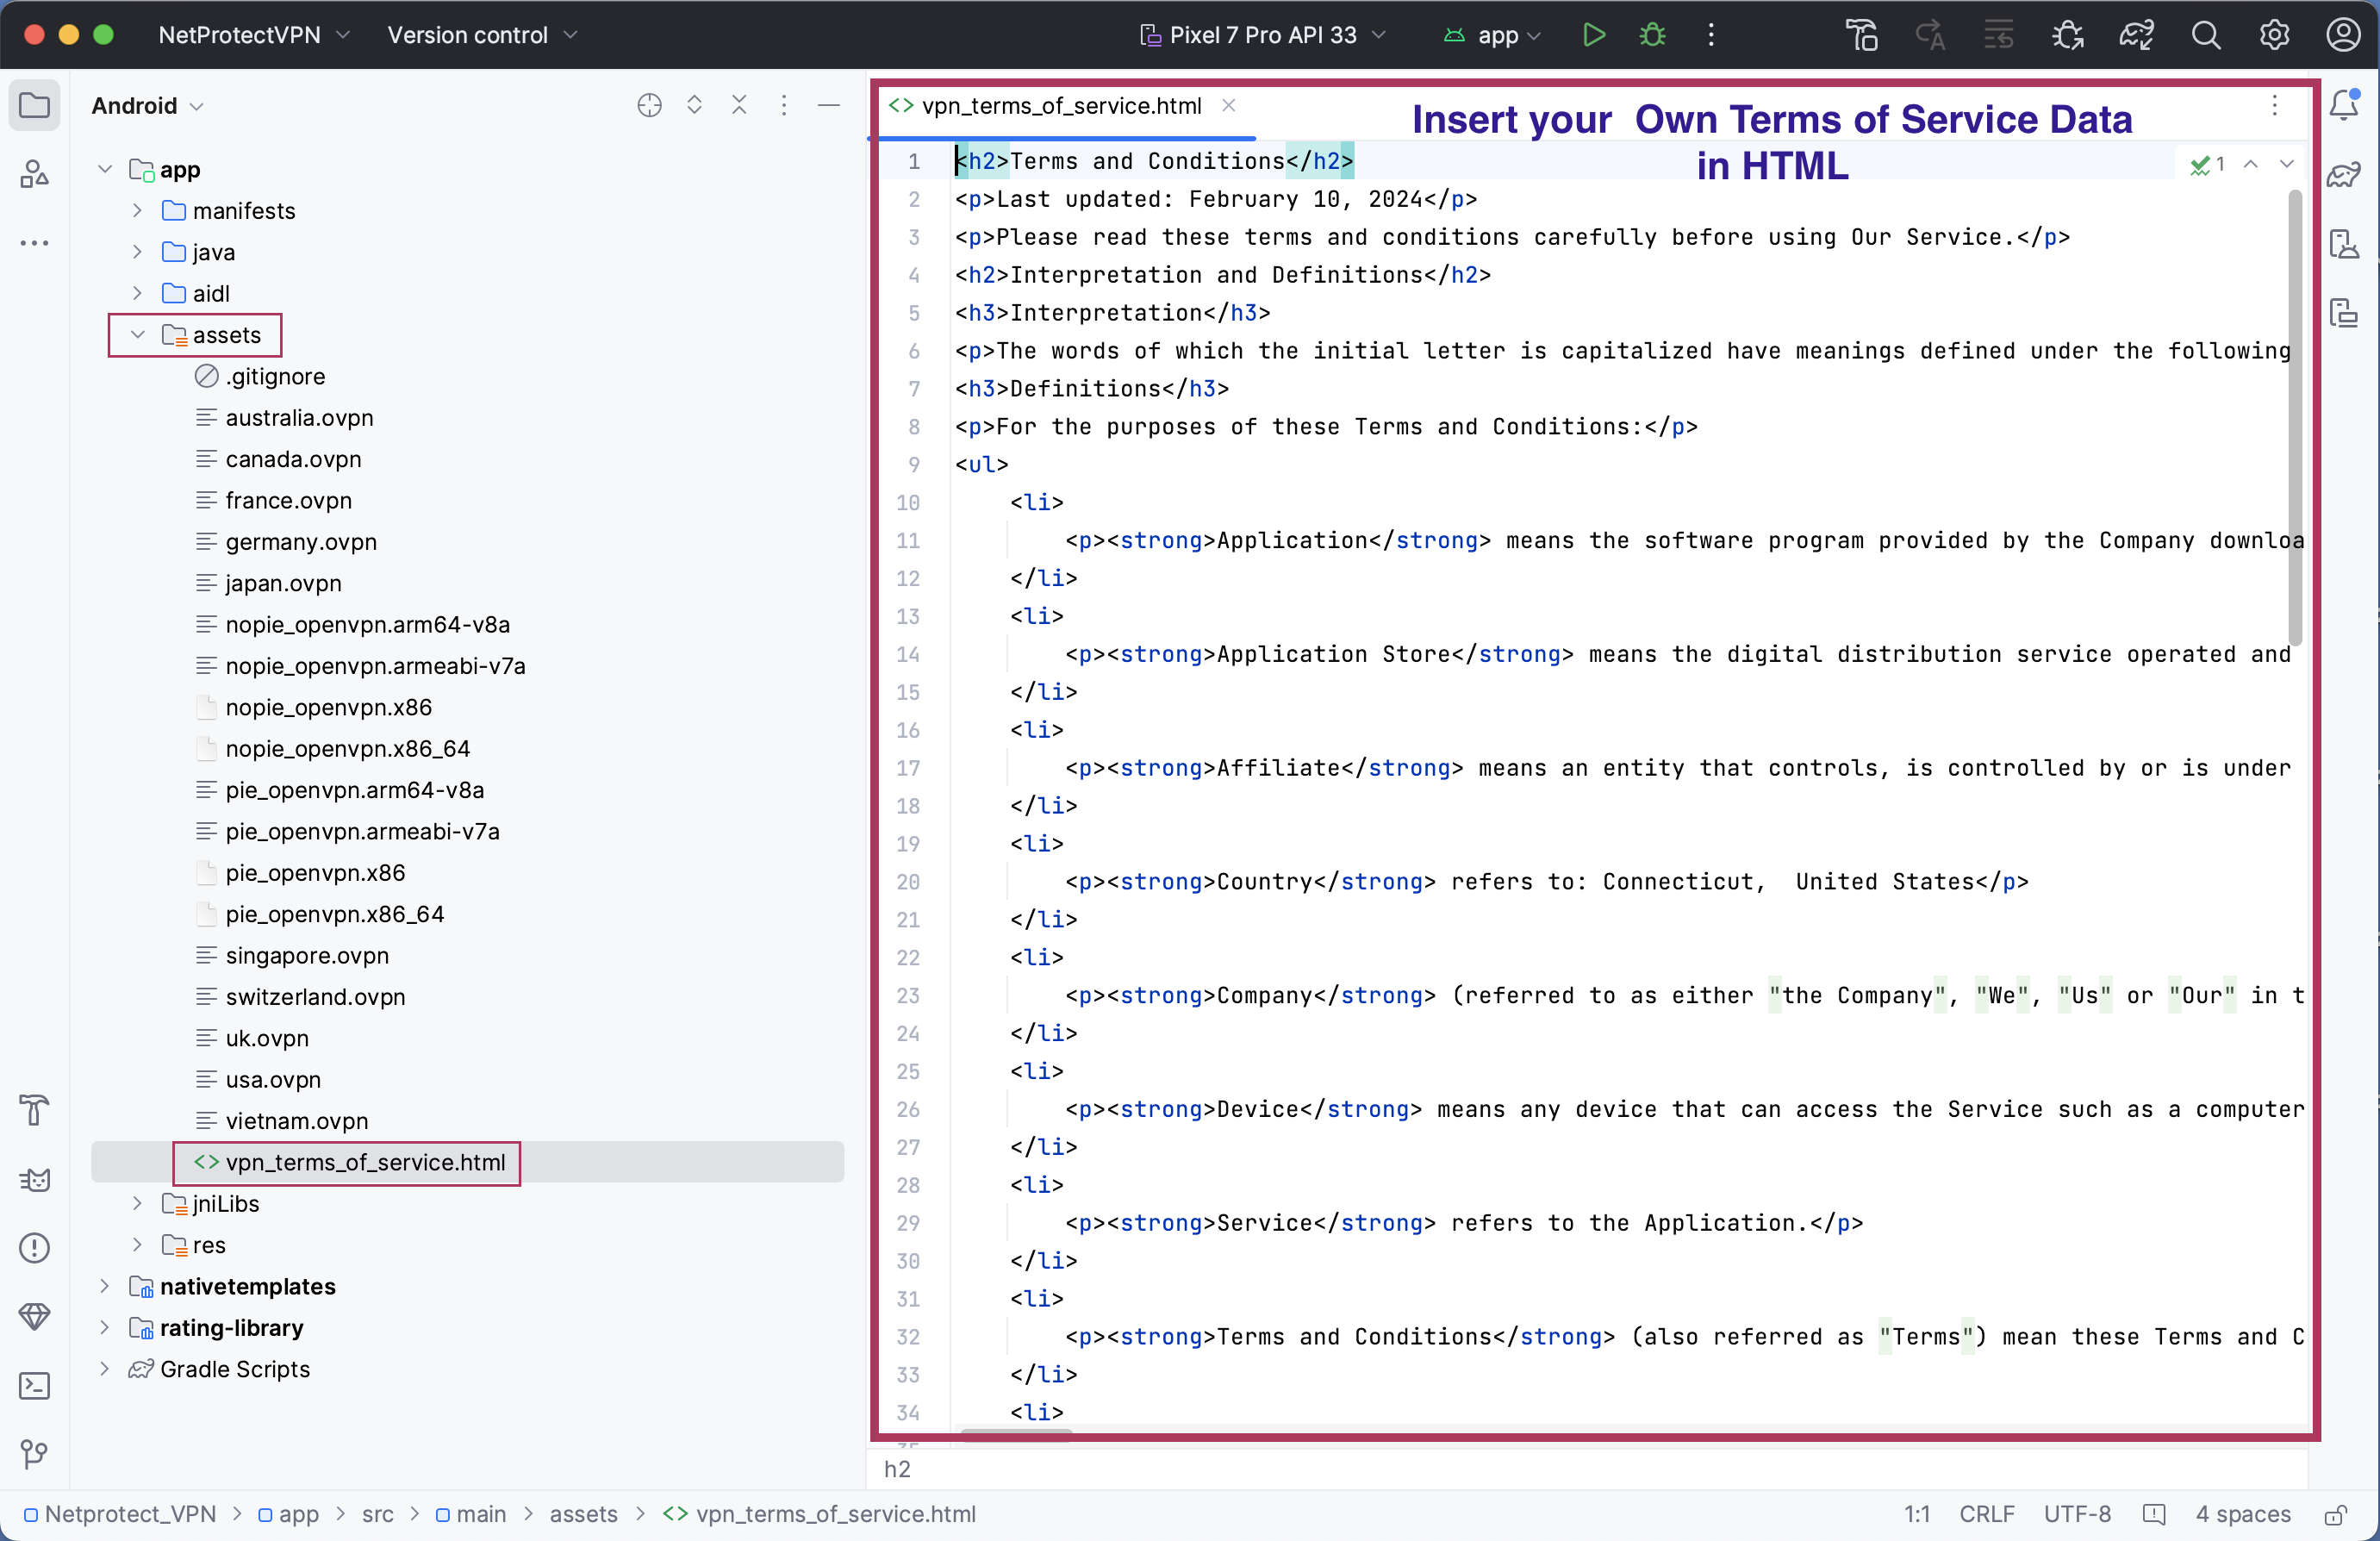
9. Terms of Services
# Now you’ll need to enter your own “terms of service” in HTML format.
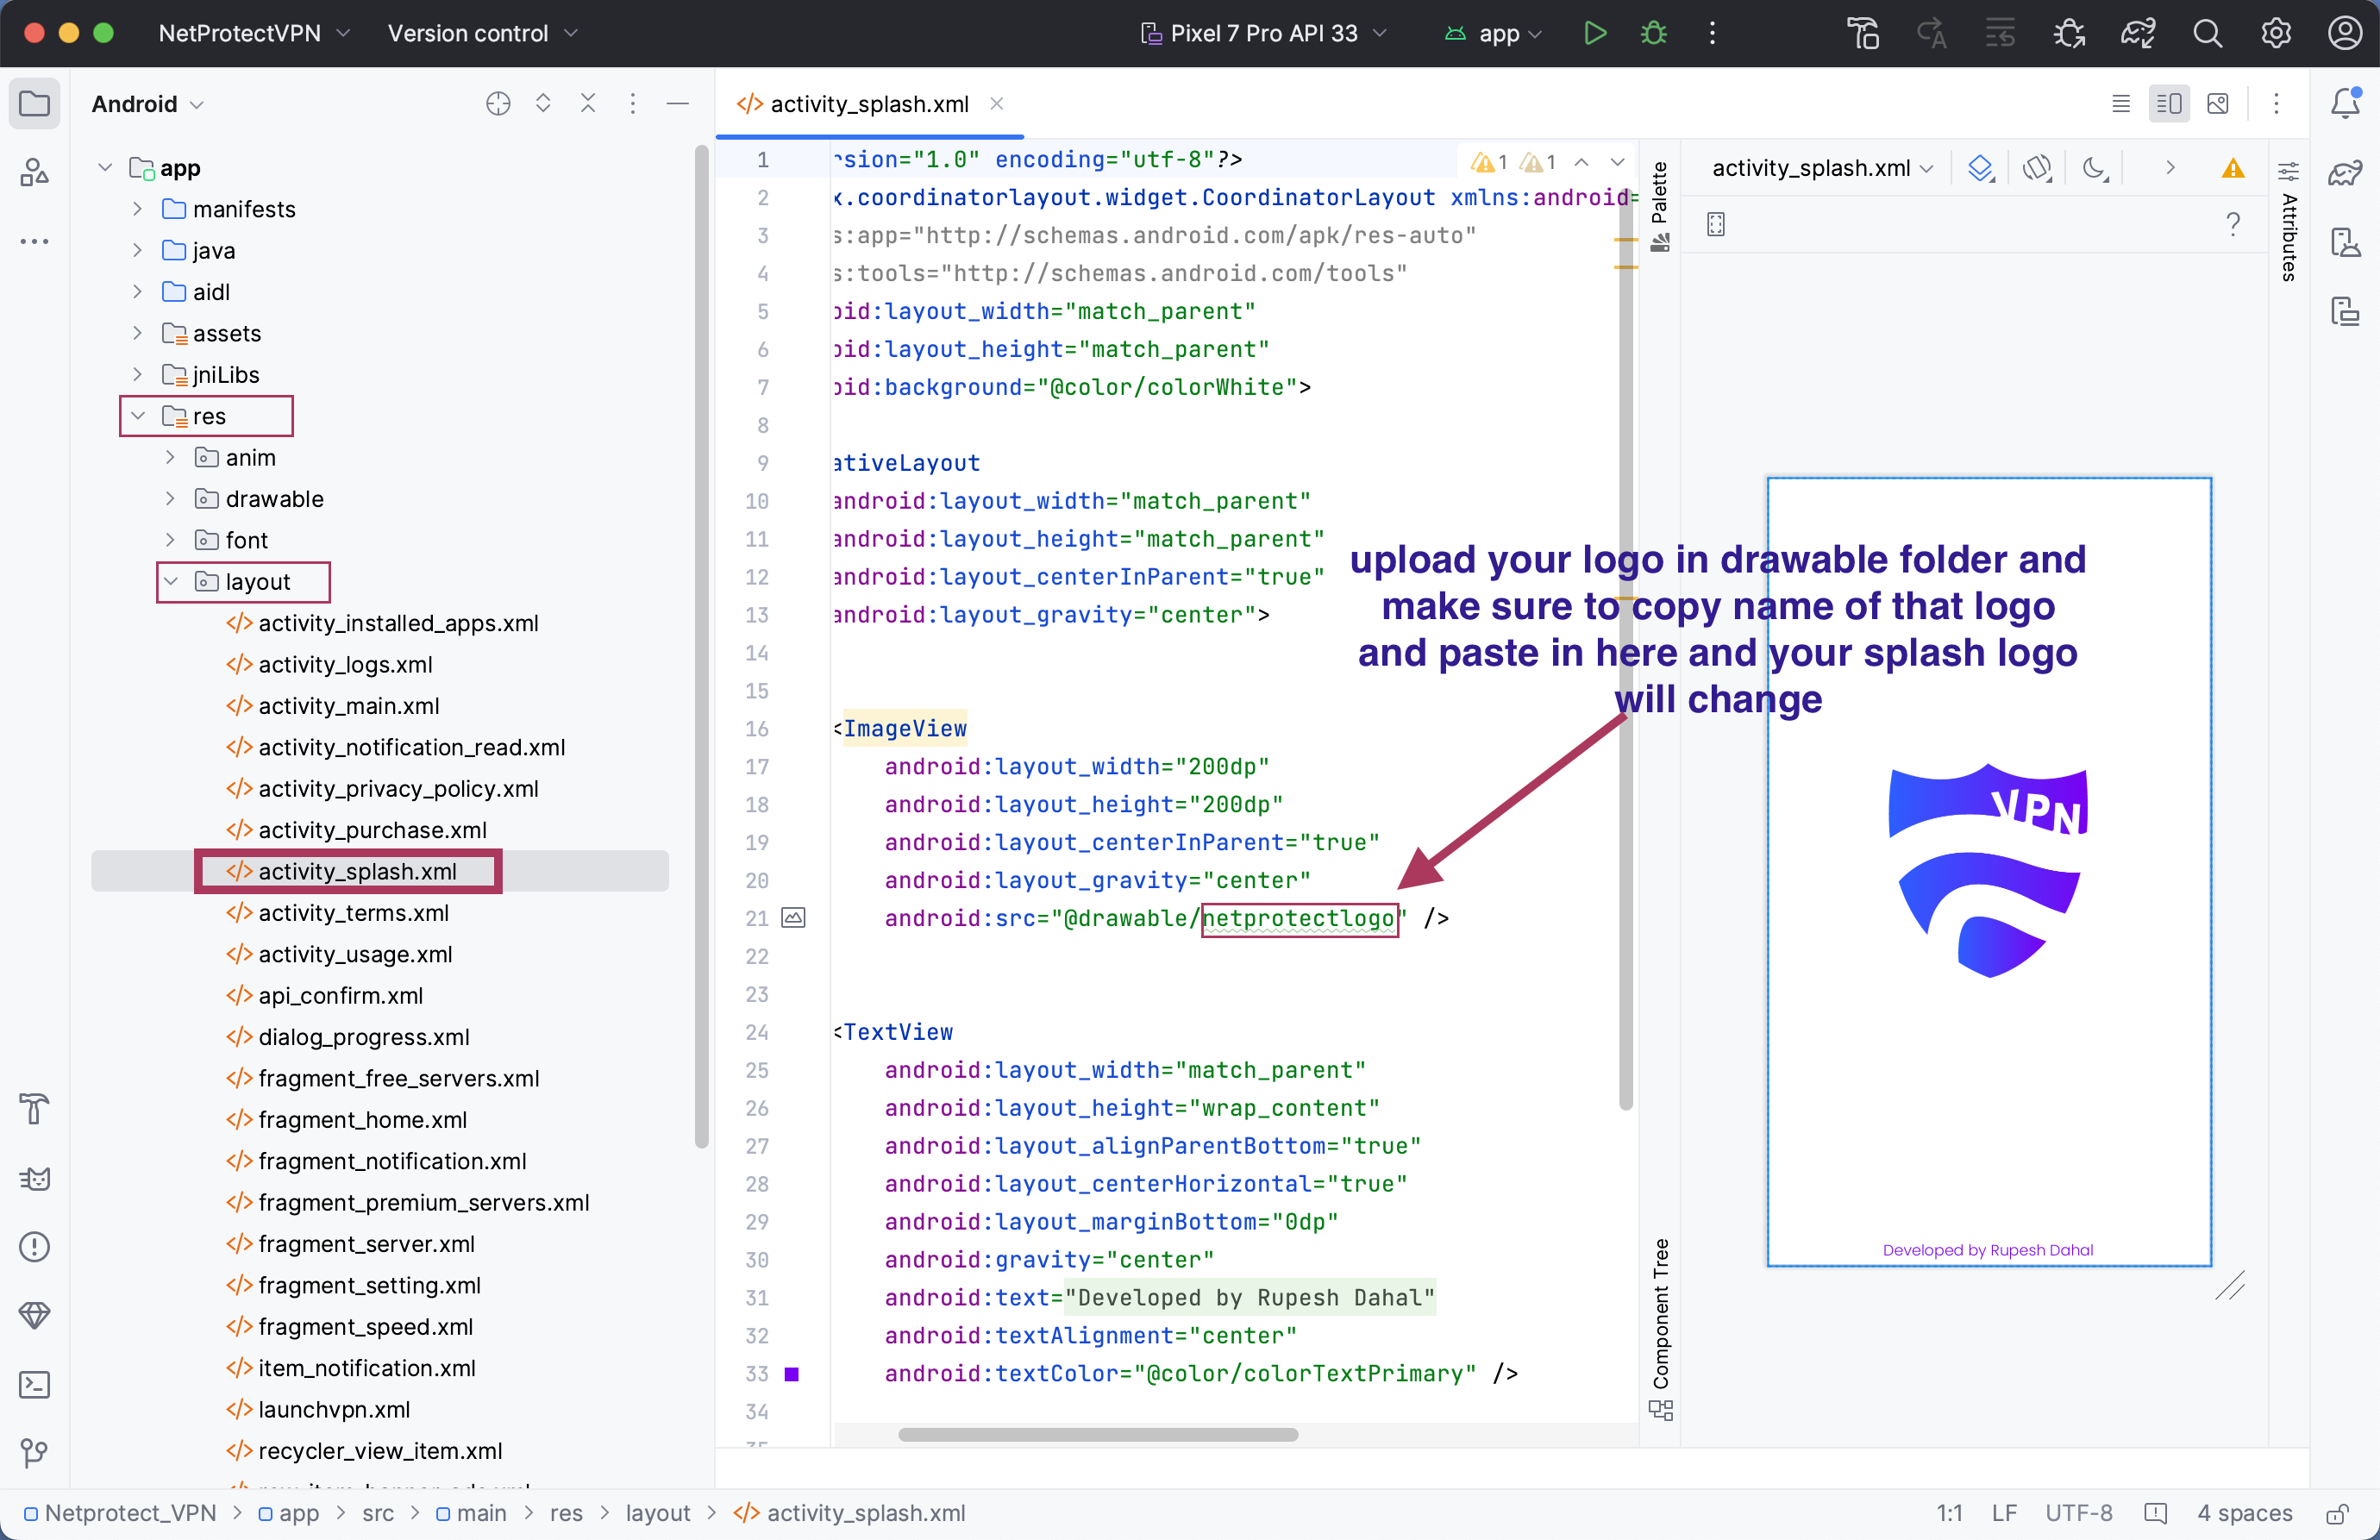
10. Splash Screen setup
# To add your Splash Screen logo, First you need to upload the logo in your “Drawable” Folder and Copy the name of your logo and Paste it here.
11. Color Setup
# Now you’ll need to change color according to your choice, and also you can setup Light & Dark Theme Color from this section.
12. Application Information
# Change it all which i marked and enter your own.
13. Now Generate .ABB File
# click on “Build”and Generate Signed Bundle”
# choose the “Android App Bundle” and click Next
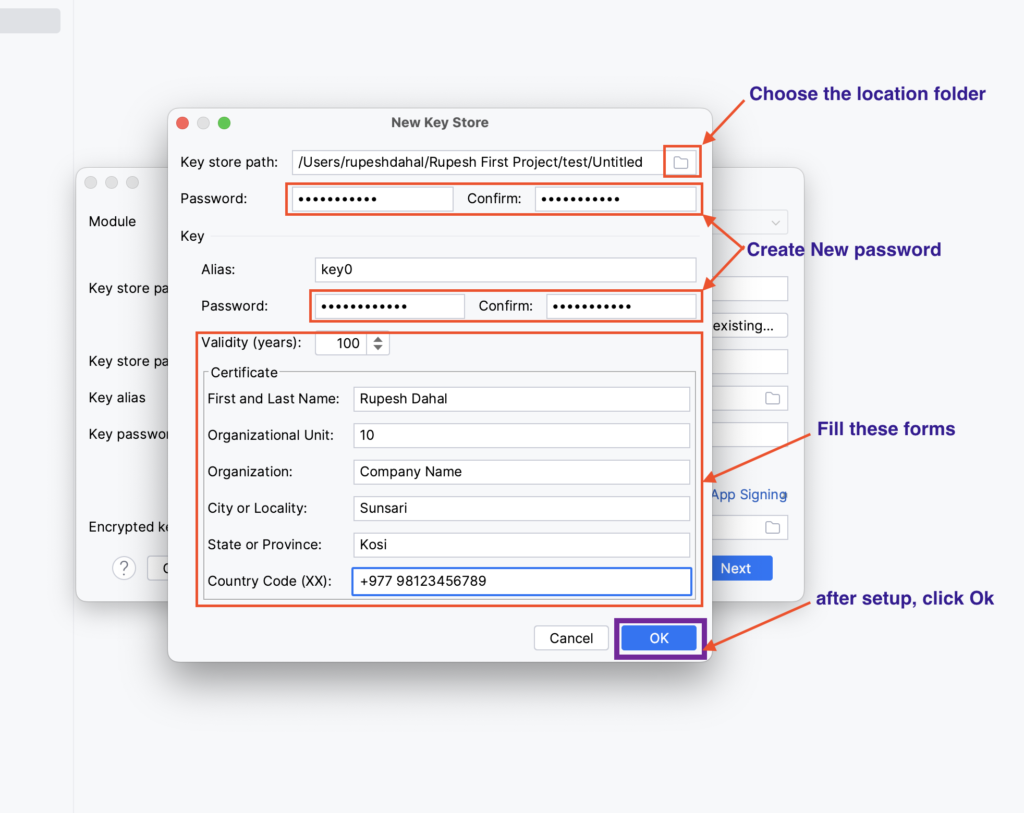
# if you don’t have the key store path then click on “Create new” to create the new path
# “Choose the location folder”to store generate ABB file.
“Create New Password” you can create same password and fill the all password forms
“Fill the remaining forms yourself” after all filled click on “OK”
# now your forms will automatically filled in this section so simply click “NEXT”
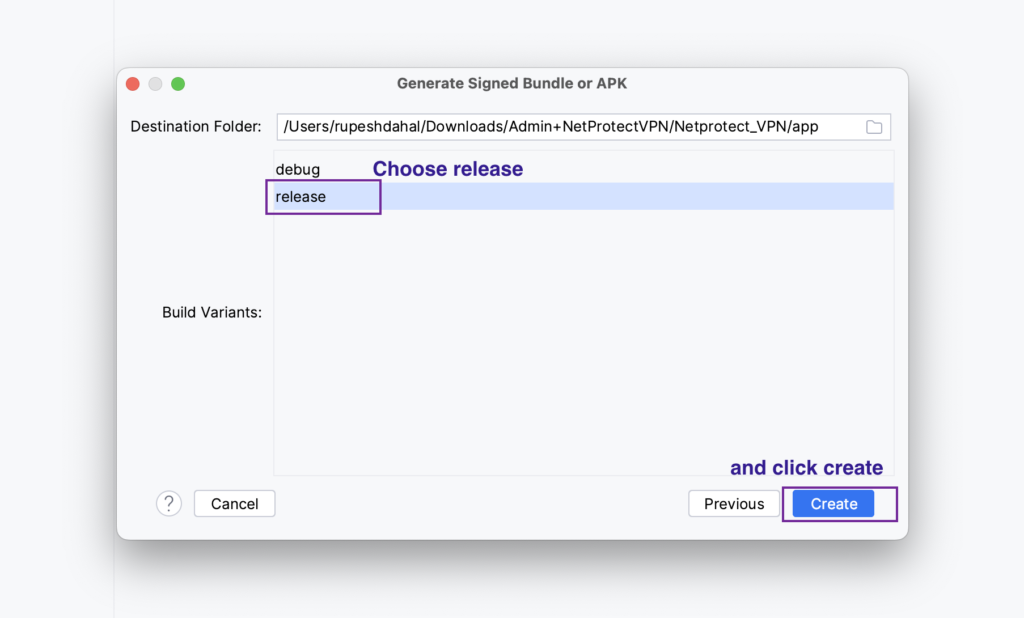
# now select “release” option and click on “Create” button, after this it will take some time to generate your file. so please wait for a few minutes.
# so after few seconds/minutes, you’ll get this popup notification when build process finished and asyou can see “locate” option there, click on it then it will goto the Generate file Section.
#. Now your file is ready to publish on “Play Console” . if you don’t know how to publish on google play console then CLICK HERE to watch the video about app publish.
14. Congratulation
# congratulation for your successfully setup Android App.